Creating Paid Events
Overview:
When setting up an event, you have the option to configure it as a paid event. This allows you to collect ticket fees from both members and the public, and set different prices and currency options for each audience.
When to Use:
-
You want to charge participants for event registration.
-
You need to differentiate ticket pricing between members and non-members.
-
You want to make the event available for public registration.
Steps to Create a Paid Event:
-
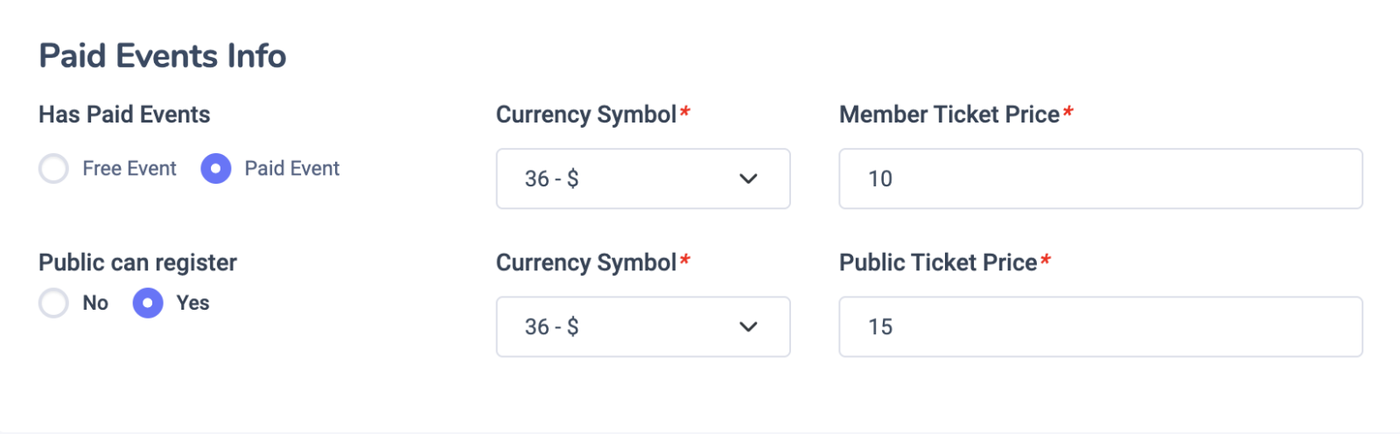
Select Event Type
Under Paid Events Info, choose Paid Event.
If you’re setting up a free event, select Free Event instead. -
Allow Public Registration (Optional)
Choose Yes or No under “Public can register.”-
Selecting Yes enables anyone to register.
-
Selecting No restricts registration to members only.
-
-
Set Currency and Ticket Prices
-
Currency Symbol: Choose the relevant currency symbol from the dropdown for both member and public pricing.
-
Member Ticket Price: Enter the price that platform members will pay.
-
Public Ticket Price: Enter the price for non-members (visible and available only if public registration is enabled).
-
-
Complete Event Setup
Fill in all other required event details (title, date, description, image, location, community assignment, etc.) in the event creation form.
Save or publish the event after verifying that all paid event fields are correctly filled.
Best Practices:
-
Clearly communicate what is included in the ticket price for transparency.
-
Set competitive and fair prices to encourage maximum participation.
-
Double-check currency selection and price fields to avoid confusion for registrants.
Tip:
Offering member and public pricing can increase registrations while providing special value to community members. Always preview your event as attendees would see it to ensure clarity and accuracy before publishing.